For creating android applications we will use MIT App Inventor 2 platform. It is an easy to use platform for creating basic to advanced app. You can create almost all types of app using MIT App Inventor 2. It is beginner friendly and so people usually start learning app making using this platform.
Starting with MIT App Inventor:
1. Click here and you will be redirected to MIT App Inventor site.
2. If this is the first time you are using MIT App Inventor then sign up with any of your google account. If you already have an account then you can simply login with it.
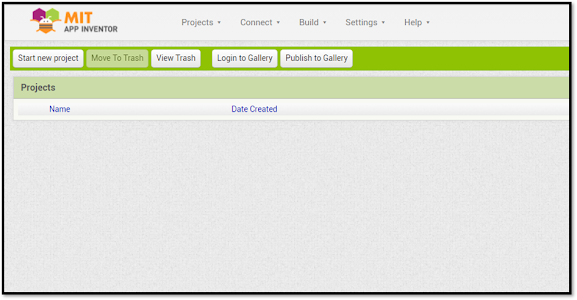
3. Once you login or sign up with an account you will see this page below.
App inventor main screen
Start new project
5. Once you start a new project, you will be asked to enter an appropriate or suitable name for your mobile app.
Project name
6. Remember that the name of the project can contain only letters, numbers and underscores. If you add space or any special character in the project name then it might throw an error.
7. After giving an appropriate name to your project you will be redirected to the page where you can start building your app.
App building platform
If you see this type of page means you have successfully created a new project and you are ready to go. So this was a simple tutorial on how to create and start using MIT App Inventor. I will soon upload more tutorials on how to create basic to advanced android app using MIT App Inventor.
To know more about this you can visit my YouTube channel where I regularly upload videos related to programming and mobile app development using MIT App Inventor. If you have any doubts regarding my tutorials then you can always feel free to ask me in the comments section below.


